How to Add Labels to a Document
Adding labels to an eSign document enhances clarity, ensuring that each element is appropriately identified and understood within the digital context.

A Step by Step Guide - Adding Labels to a Document
Watch the Video Tutorial
Watch our video tutorial to learn how to add labels to a document, including; signature placement, text fields and date.

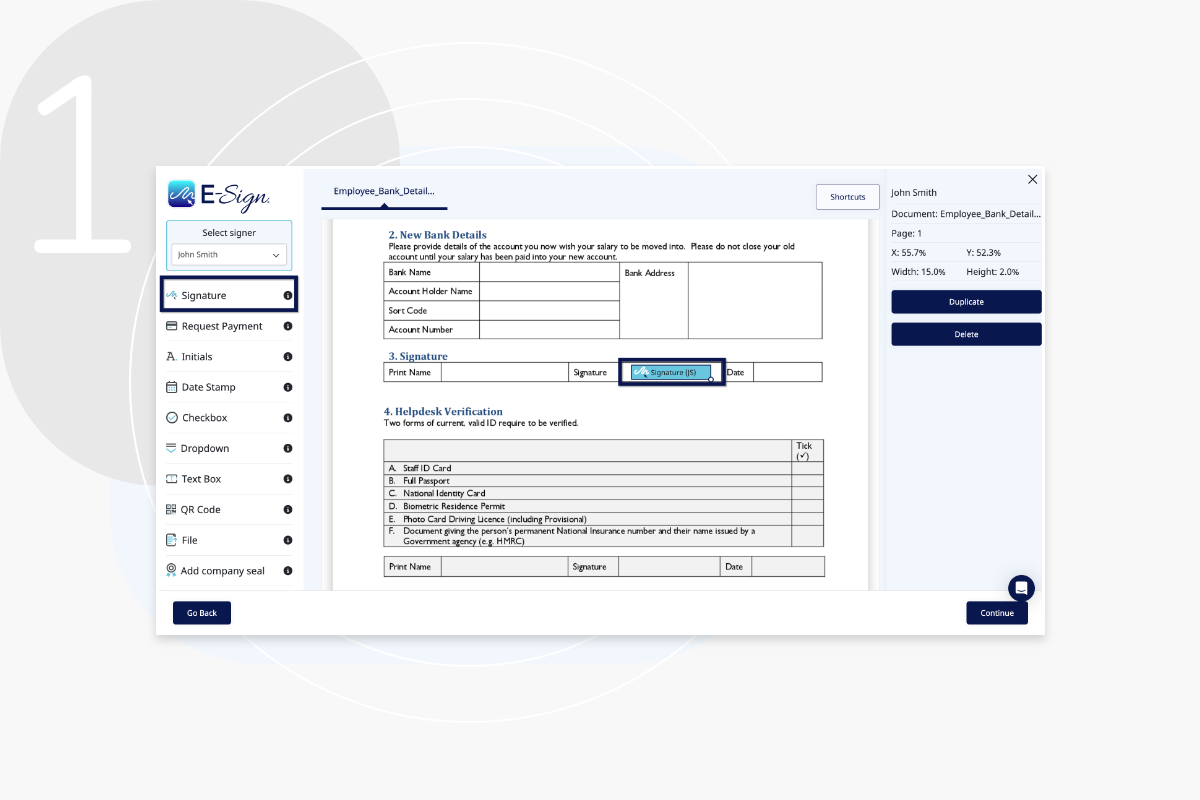
Add Signature Placement
Drag or click the label to place your signature placement field onto the document and place it wherever it’s required, you can also resize if needed.
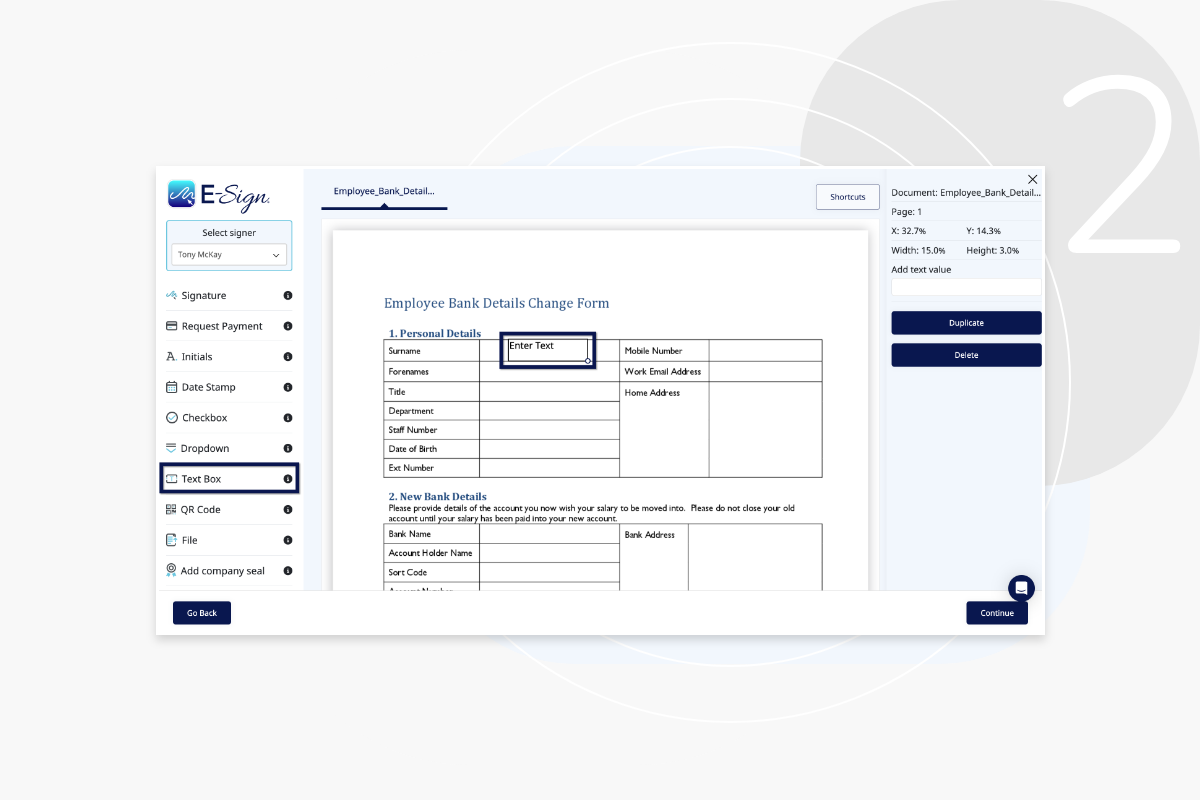
Add text
Insert text you want to appear on the document to appear when the signing process is complete. You can copy and paste this field any others that you require on your document.
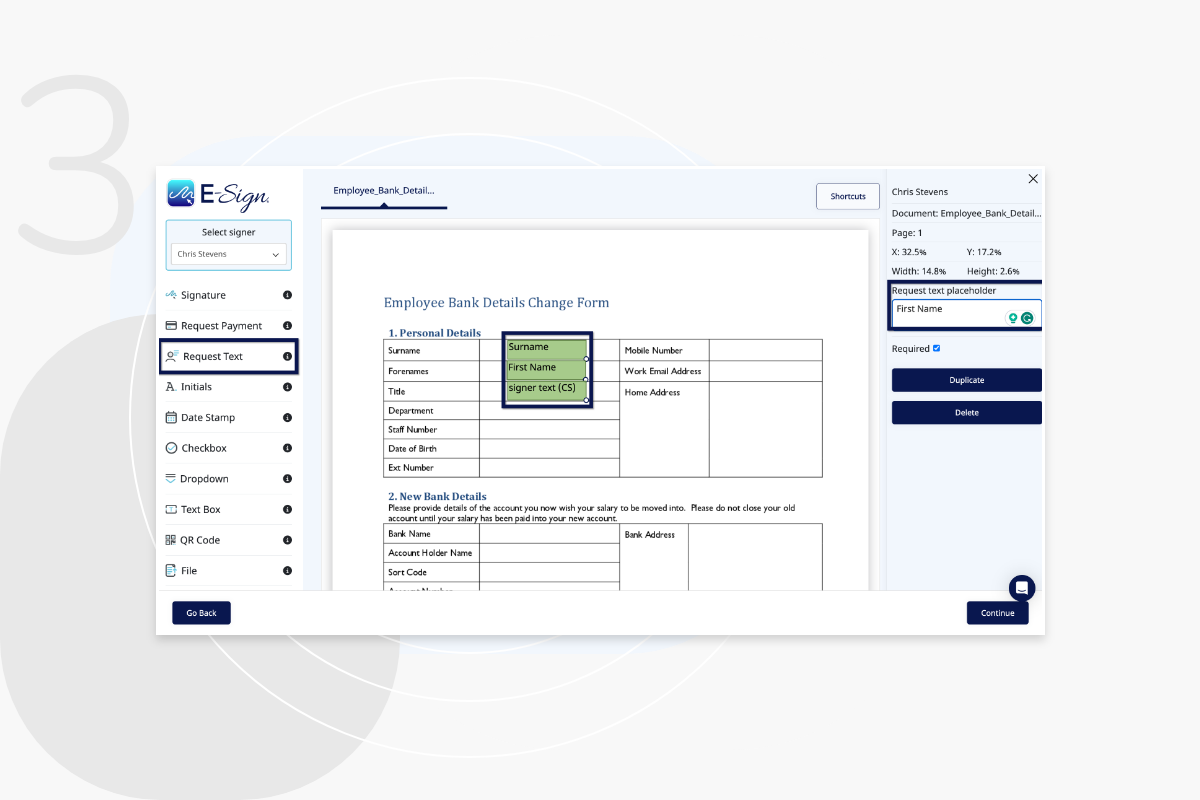
Request text
Use ‘Request text’ to request for your signer to insert that is required. You can type a prompt into the field so that the signer knows what to enter e.g. sort code or address.
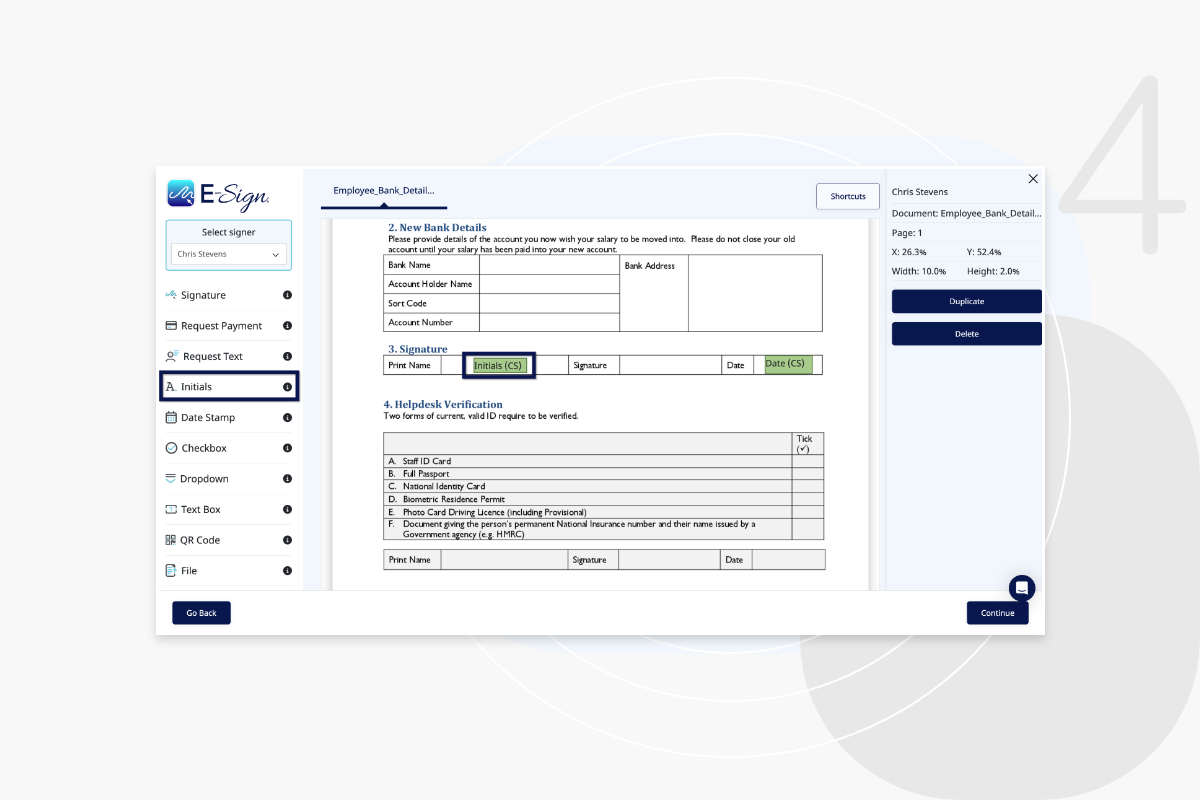
Initials
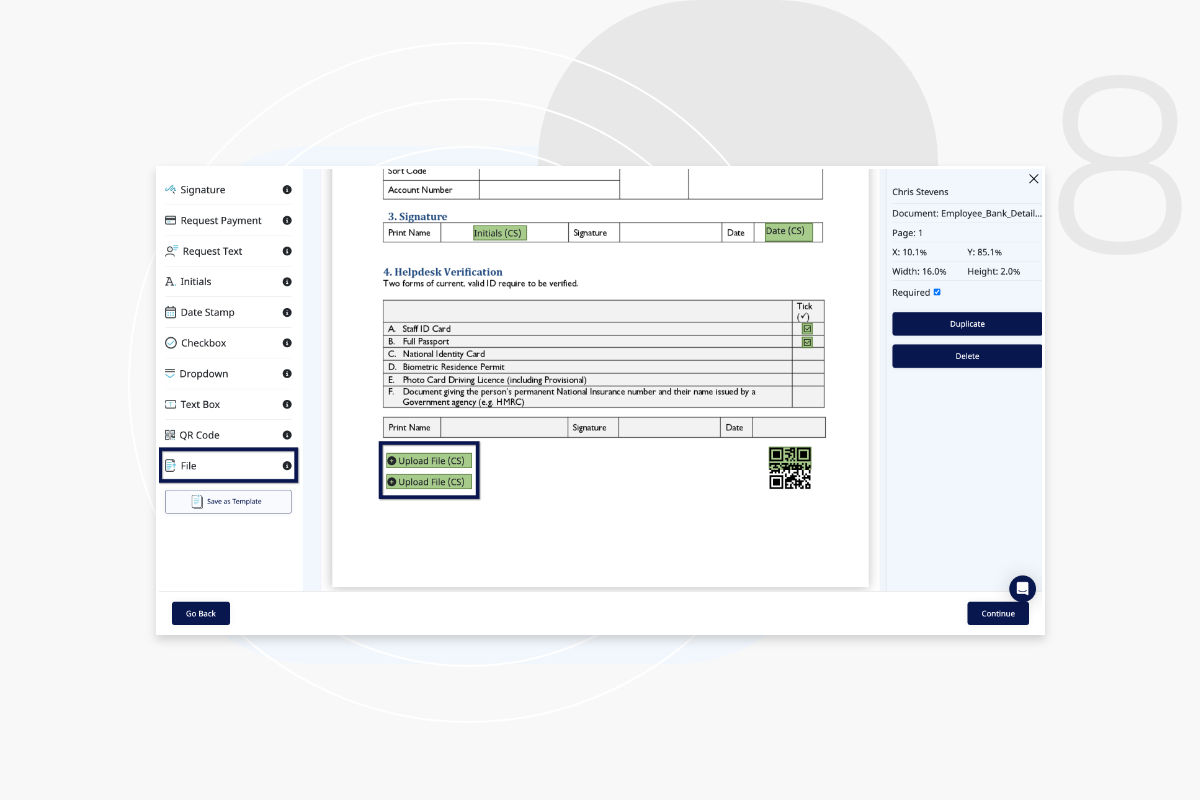
The initial of the signer will appear wherever you place the field.
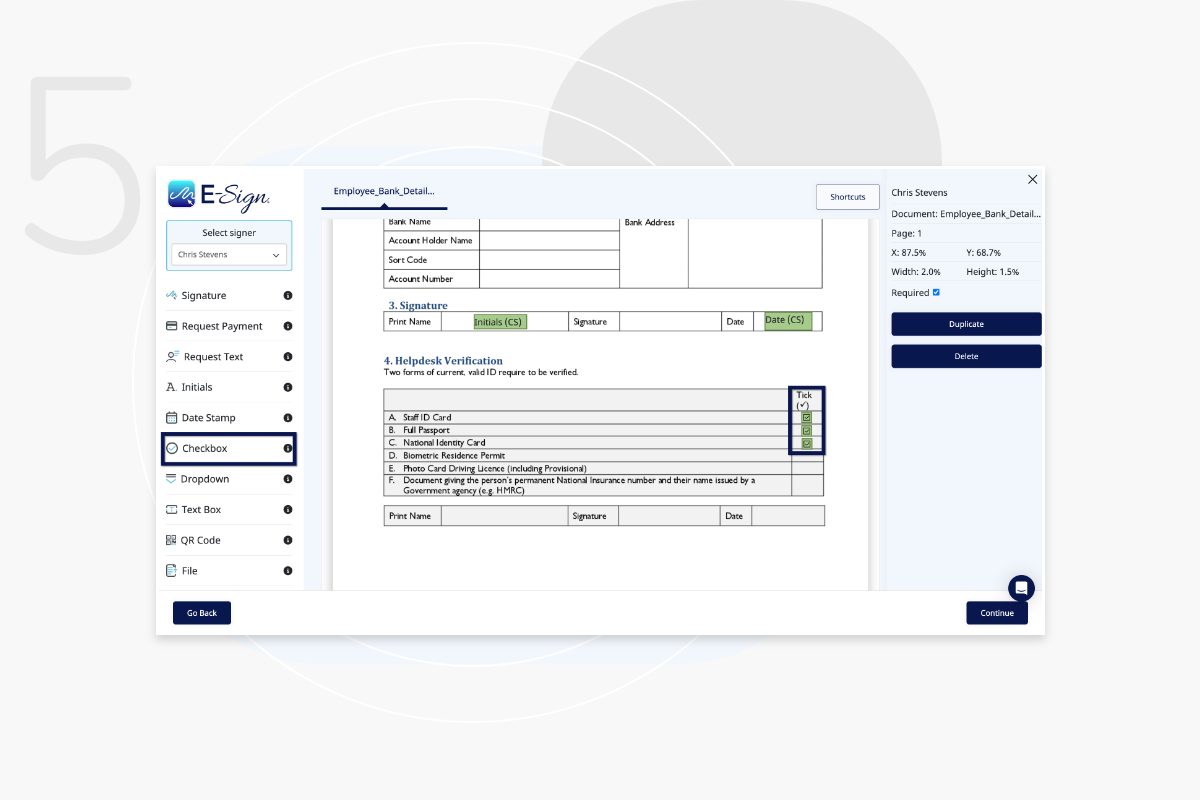
Checkbox
Place your checkbox labels into position and make sure they are labelled correctly with ‘Required’ or ‘Not Required’.
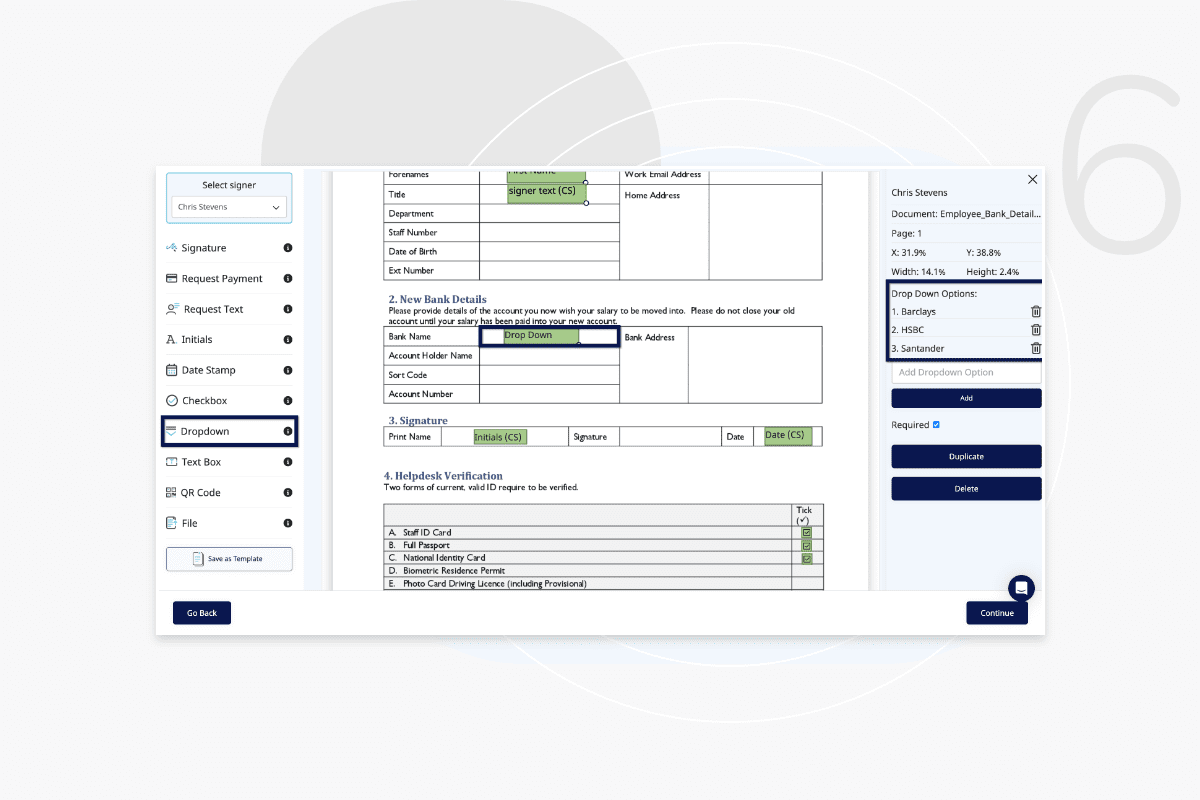
Add Dropdown
You can choose up to 15 options for your drop down label.
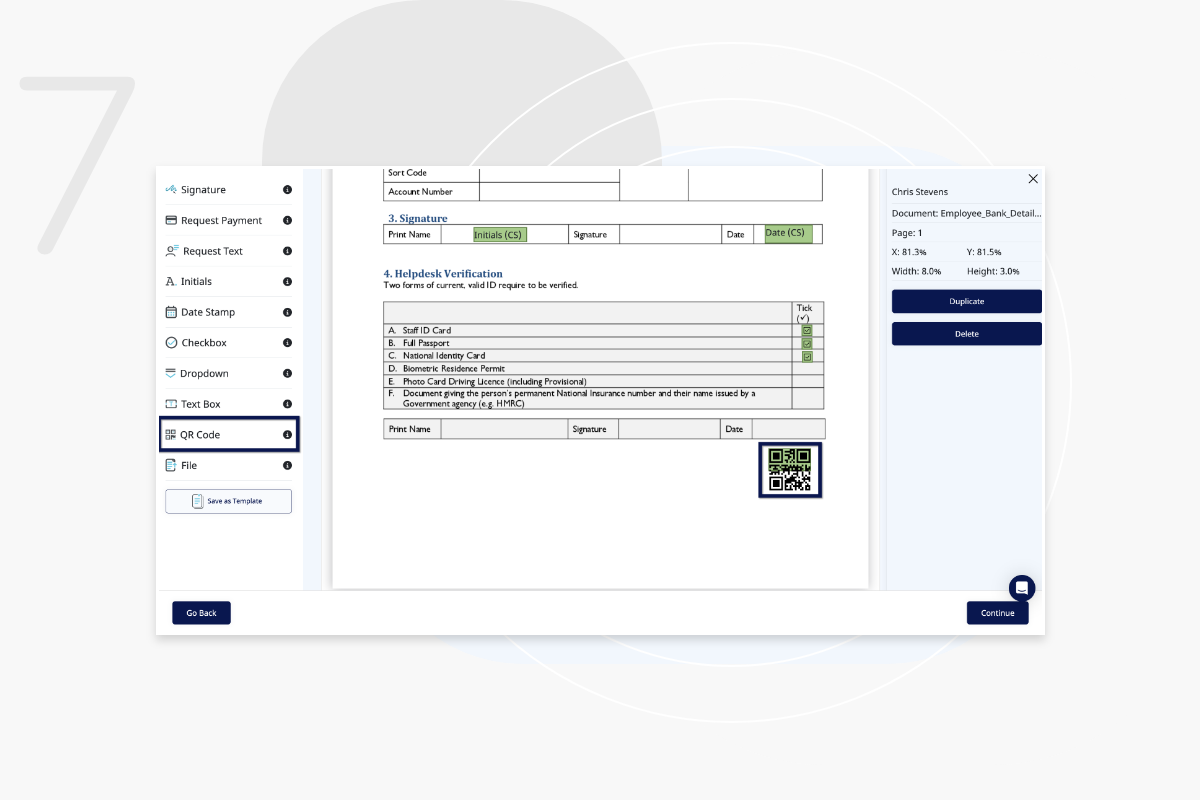
Add a QR code
You can use additional Validation on your document by adding a QR code.
File attachment
Use the file label to request attachments from each signer.
